

Welcome to my vibrant, glitter-filled world of creativity! If you've ever dreamed of crafting your own resin notebooks—whether for journaling, gifting, or adding a touch of sparkle to your workspace—you've come to the perfect place. In this post, I’ll guide you step-by-step through the process of creating my signature designs, including favorites like “Faith it Till You Make It,” “Pray Then Slay,” and “LOVED. Always.” Using resin, binder rings, and plenty of love, we’ll bring these unique notebooks to life together!

Materials You’ll Need
- High-quality resin (I use a glossy, durable, non-yellowing resin for a clean, smooth finish)
- Resin notebook molds (A5, A6, or A7 depending on your size preference)
- Binder rings (silver or gold—your choice!)
- Lined paper inserts (I use 50 sheets per notebook)
- Tabbed dividers (5 per notebook for organization and color; optional)
- Resin bookmarks molds (optional but adorable)
- Zippered pouches (optional; for deluxe versions)
- Vinyl decals or stickers for your cover phrases
- Glitter, mica powder, or pigment for color

Step-by-Step Process
1. Mix & Pour Your Resin
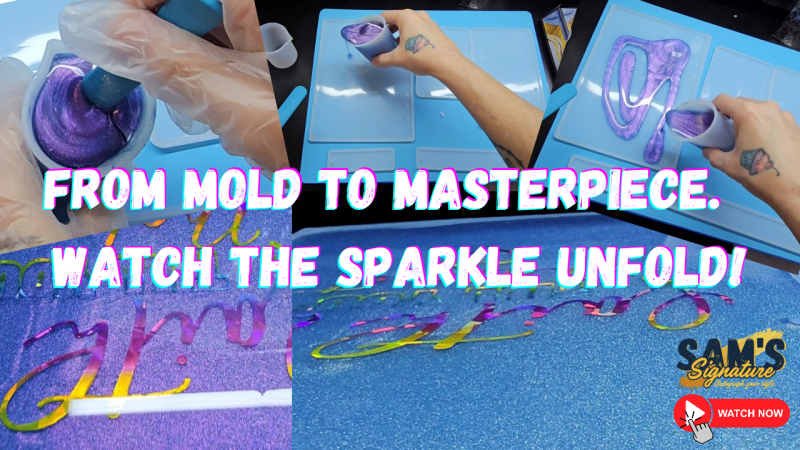
Follow your resin’s instructions carefully. Mix your resin and hardener, add glitter or pigment, and pour into your notebook mold. Tap gently to release bubbles, torch if necessary, and let it cure fully (usually 24–48 hours).
Create a matching resin bookmark using leftover resin and a small mold. Two bookmark molds were included with the resin molds I purchased from Amazon. (Optional: Add a ribbon or charm for flair!)


2. Design Your Cover Message
Choose a phrase that speaks to your soul or your audience. I love using affirmations like “Faith it till you make it” or “Pray then Slay”—they’re bold, uplifting, and perfect for daily motivation.
3. Add Your Cover Phrase
Apply your vinyl decal or sticker to the front cover. I use holographic or multicolored vinyl for extra shine. Seal with a thin layer of resin if needed.

4. Assemble Your Pages
Insert 50 sheets of lined paper, add your tabbed dividers, and clip everything together with binder rings. For deluxe versions, add a zippered pouch or a detachable bookmark with a “Today” tab. I purchased A5, A6, and A7 planner inserts from Amazon. You can find sets with or without the tabbed dividers, zippered pouch, and detachable ruled page marker.


Tips for Success
- Use a silicone mat to catch spills and protect your workspace.
- Mix resin slowly to avoid bubbles.
- Customize your dividers with stickers, washi tape, or mini blessings.
Ready to Shop or Create?
I sell these handmade notebooks in my shop, and I’d love to see your creations too! Tag me on Instagram @Sams.Signature and share your sparkle.
Want to Watch the Process?
Check out my full video tutorial on YouTube: DIY Resin Notebooks | Fabulous Handmade Journals.
Add comment
Comments